


Particle analysis is a centuries-old practice used to identify the quality of material that goes into consumer goods. As time goes and technology impacts everyday life, lab managers and technicians turn to devices, such as the W.S. Tyler Computerized Particle Analyzer, to automate their process and reduce human error.
Such devices, however, use complex systems to produce results and must be installed by a professional. The Computerized Particle Analyzer is no different.
So, what should you expect when your device arrives at your facility and requires professional installation.
To make this often daunting task seamless, W.S. Tyler has trained technicians on staff that can help you tackle all aspects of the Computerized Image Analysis operation, whether it's installing the device or resolving a malfunction.
To create a sense of transparency on what you can expect when your device is being installed, this article will cover:
- What a W.S. Tyler Computerized Particle Analyzer is
- What the Installation process consists of
- How to get the controller software up and running
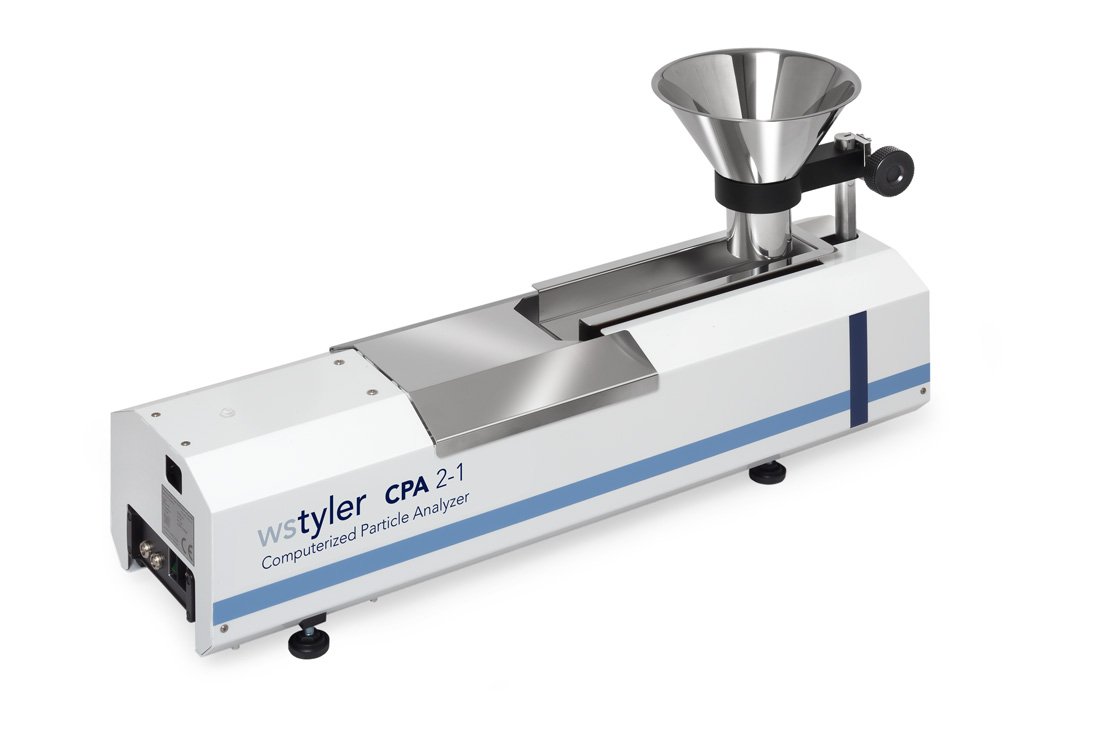
What Is a Computerized Particle Analyzer?
The W.S. Tyler Computerized Particle Analyzer, or CPA for short, is our dynamic image analysis system designed to provide insight into your sample material's particle size and shape. It was created in the 90s with hopes of taking traditional particle analysis methods and incorporating them with state-of-the-art computing technology.
This device works to analyze dry, free-flowing material down to 25 microns. It employs a high-resolution line scan camera that allows for the analysis of 28,000 lines per second, which equates to upwards of 10,000 individual particles per second.
Installing the CPA
To properly install the CPA and the correlating software, one of our trained CPA technicians will have to visit your facility. That said, this on-site installation, as well as the following, is included in the cost of the device:
- The CPA unit itself
- A PC that meets the specification requirements of the CPA software (either an all-in-one or a tower and monitor combo)
- The required cables to power the unit and connect it to the computer
- A calibration frame (to ensure the line scan camera is calibrated and working correctly)
- Both a hard and digital copy of the user manual
- A USB software key that is needed to open the CPA software
- The CPA software itself (CPA Serv)
- A cleaning brush
Read the following article to learn more about what to expect with a CPA purchase:
Now, when it comes to the install process, the first step is to unbox the unit and all of its attachments. You will want to make sure the all of the following equipment to complete the install:
- The CPA
- The CPA funnel
- The material box
- Sample material
- The power cord
- The USB ord
- A CAT-5 Camera Cable
- The Expert Hardware Key
The next step is to install the CpaServ software. This involves the following command prompts that help creates a tailored experience.
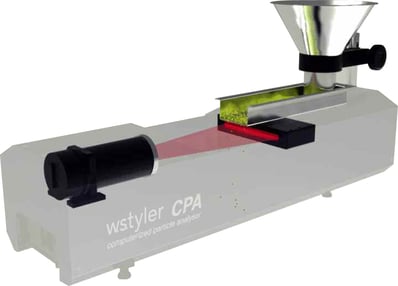
At this point, we being to assemble the CPA. The funnel is attached, the material box is placed under the feeder, the CPA is linked to the PC using a USB cable, and the CAT-5 camera is plugged into both the CPA and PC.
The USB hardware key is then plugged into the PC. This USB key must be kept in an easy-to-locate, secure area as the software will not load without it.
The final step is to ensure the CPA is receiving adequate power and the lighting array is adequately illuminated. After this is complete, the software is ready to set up.

Using the Software for the First Time
When you initiate the software, you must log in as "Administrator" using the password "sa". This will be required every time you log in.
Now when first using the software, you will first need to set up a material SOP.
Doing so requires you to create a sieve set for each type of material you will be testing. To do so, click the sieve set tab, give the material/sieve set an identifiable name in the sieve set designation column.
Now, you will find a sieve sizes column and a sieve set column on the right side of the screen. Use these two columns to designate what standard you will be following and build out your sieve set.
Once this is complete and you have verified everything, you should move to the material SOP tab.
Here, you will find a description column. This column should be used to label the material the sieve set will be testing.
That said, you should now select the sieve set in the next tab. You can leave the alignment file blank, as the software will use this tab to consolidate the results.
The next step is to locate the "file for data" tab. This is where you the folder location you wish to store all the testing results you obtain while using the CPA.
You should leave the folder for text export column blank while deleting any words/letters from the file naming conventions columns. If you neglect to delete this text, testing results will be saved using a timestamp rather than a material name.
The feed rate column is used to designate the speed at which material is fed throughout the feeder tray and past the line scan camera. As this speed is based on the material being worked with, it should be defaulted to 6.
You now ensure the limit curves box is not checked.
Turning to the unit itself, you should now lower the funnel as low as it can be and distribute your material into the funnel. After your material has been fed into the funnel, you should raise the funnel two to three times the height of the largest particle to allow for even particle distribution.
At this point, you should check to ensure the material tray is underneath the feeder and can properly catch your sample material.
You can now go back to the software, select the material being tested in the Material SOB tab, and press the green play button to begin testing your material.
NOTE: If you initiate the software before powering on the CPA, the software will not work. The CPA must always be one prior to starting the software.
Yield Accurate and Repeatable Results Using Your CPA Unit
The W.S. Tyler Computerized Particle Analyzer is our dynamic image analysis system designed to test 10,000 dry, free-flowing particles per second. As it is a fairly complex piece of equipment, one of our trained technicians will provide a two-day visit in which we set up your CPA unit and train your staff to use it properly.
This is, of course, included in the price of the unit.
After you have been and your device is installed into your lab setting, you can begin using the CPA to improve the efficiency of your particle analysis operation. For the sake of achieving accurate and repeatable results consistently, it is critical that you understand and implement best practices when conducting a dynamic image analysis.
W.S. Tyler continuously seeks to help customers integrate the latest technology into their particle analysis operation. This included helping them maintain their dynamic image analysis testing, from the installation to the procedures to troubleshooting.
To learn how to conduct a reliable dynamic image analysis using the W.S. Tyler CPA, read the following article: