


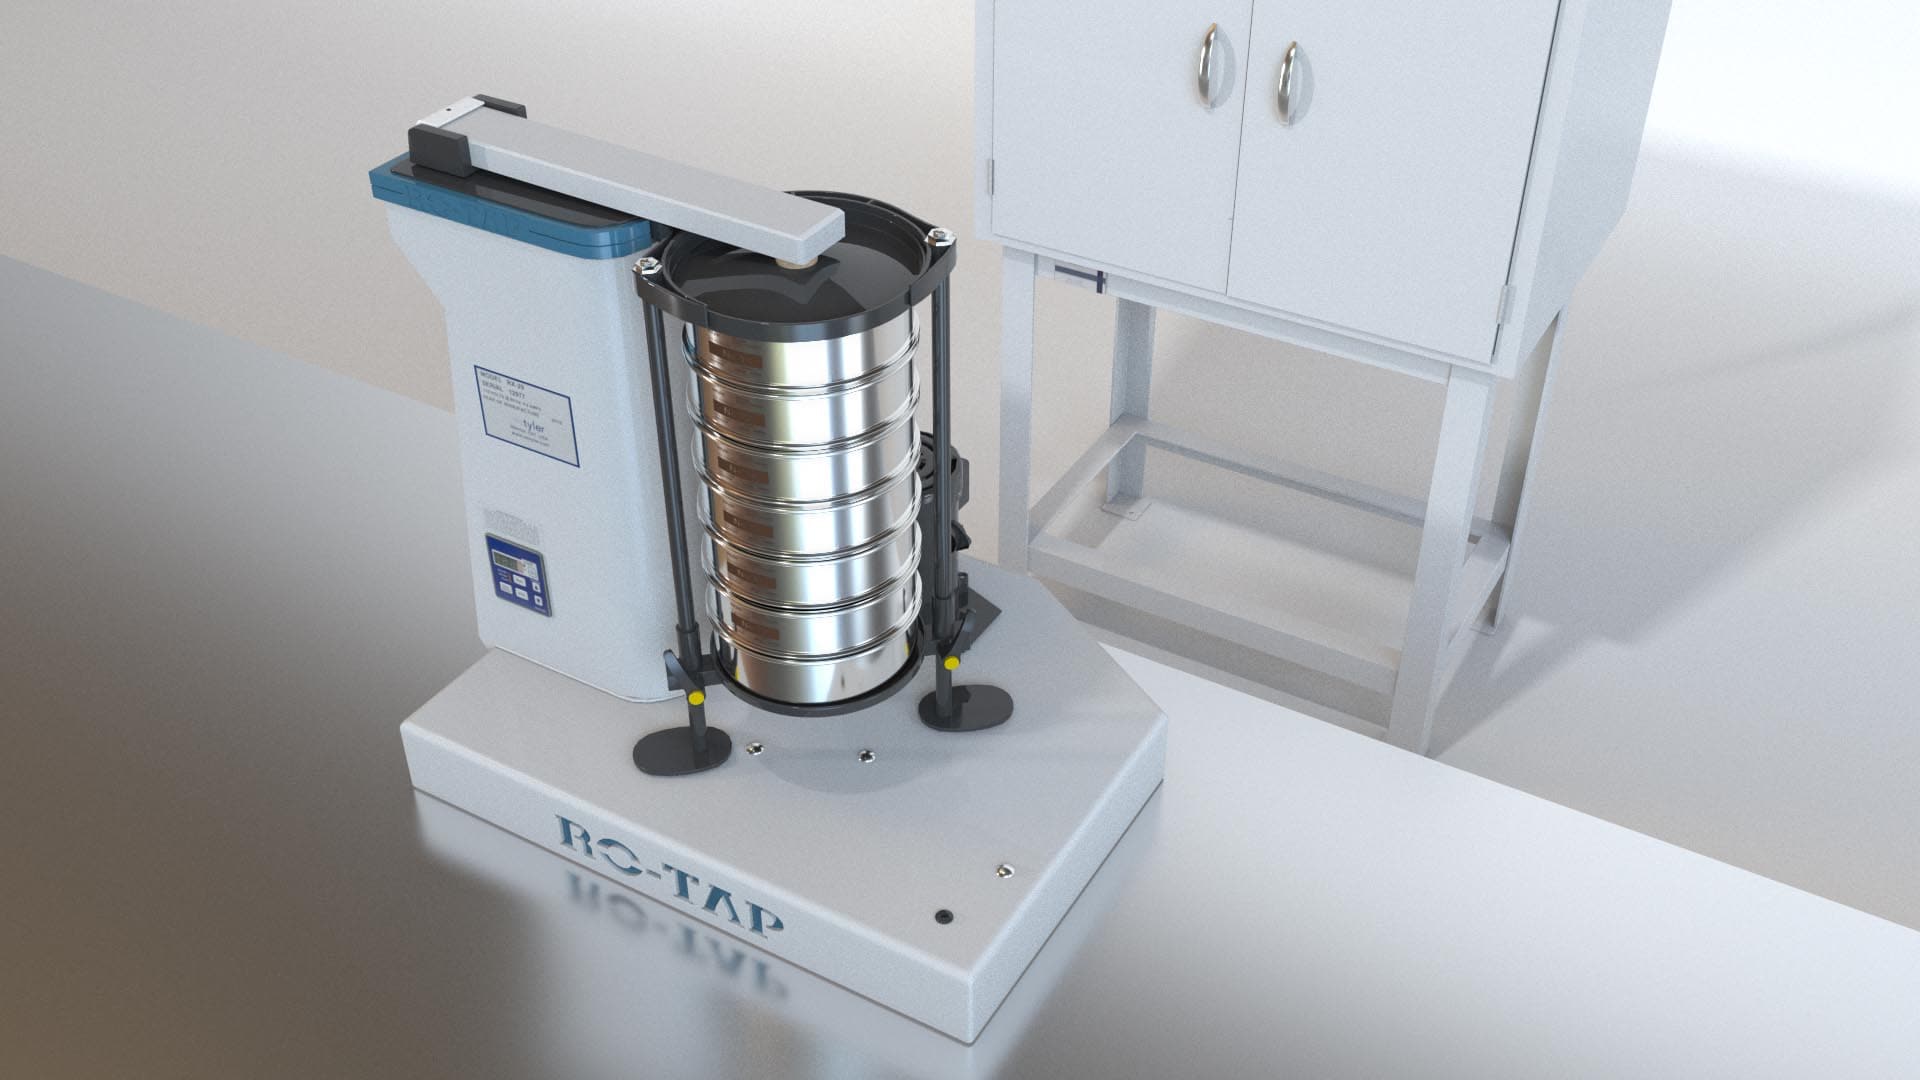


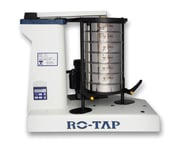
Since the 1930s, the W.S. Tyler RO-TAP® Sieve Shaker has been integral to the production of accurate and reliable test sieve analysis results. Having been written into dozens of industry standards, the RO-TAP is truly a pioneer of the particle size analysis industry.
While the RO-TAP RX-29 and RX-30 were designed to work as a standalone devices, there are several accessories, such as the RO-TAP lab kit, that will enhance your overall test sieve analysis process.
With over 140 years of particle analysis, W.S. Tyler is here to ensure your lab station is complete and equipped to produce optimal test sieve analysis results.
In this article, we will provide insight into what a lab kit is, how much it costs, what the installation process looks like, and how to keep your lab kit in tip-top shape.
What Is a RO-TAP Lab Kit?
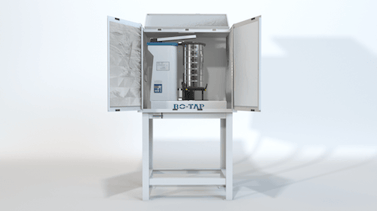
In relation to the W.S.Tyler RO-TAP Sieve Shaker, the term Lab Kit refers to a RO-TAP, test stand, and sound enclosure bundled together in a single purchase. Think of it as RO-TAP accompanied by the accouterment of any test sieve analysis.
While items included in the lab kit are not necessarily required to conduct a reliable test sieve analysis, they are designed to enhance your process.
When you purchase a Lab Kit, you will receive:
- The RO-TAP unit you selected
- A test stand (bolts to attach RO-TAP included)
- A sound enclosure that will reduce the noise level of the RO-TAP from 85 db to 75 db
How Much Does a Lab Kit Cost?
The two most commonly used lab kit bundles are the RO-TAP RX-29 Lab Kit and the RO-TAP RX-30 Lab Kit. Despite which one you choose, we take the list price of the three components of the lab kit and provide a 10% discount from the cost of the three components if they were bought individually.
With that, the RO-TAP RX-29 lab kit costs approximately $4,293.48 and the RO-TAP RX-30 Lab Kit costs approximately $4,721.19.
If you’re interested in how much a RO-TAP costs individually, refer to our article: How Much Does A RO-TAP® Sieve Shaker Cost? (Pricing, Factors, & Models).
How to Prepare Your Lab for a RO-TAP Lab Kit Installation
There isn’t too much prep work needed to ensure your lab kit is installed properly and efficiently. You must first determine a location that is large enough to accommodate the footprint of the test stand (20 in. wide x 32 in. high x 28 in. deep) with a sound enclosure (35 in. wide x 24 in. deep x 29 in. high) attached on top.
You then want to make sure the floor is level. Placing the lab kit on an unlevel floor may cause an increased amount of strain on a particular part, resulting in frequent replacement and potentially skewed results. An unlevel floor will also make it difficult for those that choose to bolt the test stand to the floor for additional support.
What Does the Installation of a RO-TAP Lab Kit Look Like?
The first step of a proper installation of a RO-TAP Lab Kit is to carefully take the test stand out of its box. Once the test stand is out of the box, it should be positioned where it will operate in the lab.
If you wish to bolt the test stand to the floor for additional support, this should be done next.
If not, the sound enclosure should then be carefully retrieved from its box and placed on top of the test stand, lining up the pre-drilled holes on both items.
At this point it's time to place the RO-TAP into the sound enclosure. With the help of an assistant (we do not recommend doing this alone), lift the RO-TAP into the sound enclosure and line up the pre-drilled holes on the sieve shaker with the holes of both the test stand and sound enclosure.
The final step is to bolt the RO-TAP into place, essentially sandwiching the sound enclosure between the test stand and the RO-TAP. It should be noted that the hammer on the RO-TAP should be adjusted using a T-Square prior to placing it into the sound enclosure.
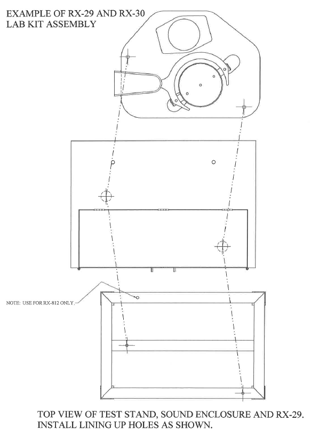
NOTE: Be sure that the nuts at the bottom of the test stand have been tightened before using your RO-TAP device.
Now, you simply thread the power cord through the sound enclosure and your test station is ready to begin producing accurate and reliable particle size analysis results.
What Maintenance Is Needed to Ensure Your Lab Kit Remains Pristine?
We recommend that you check to ensure the nuts and bolts through the lab kit are tightened and secure on a consistent schedule. As the RO-TAP uses a forceful oscillating motion to promote particle movement through the sieve stack, the bolts can become loose.
This may cause your test sieve analysis to operate louder than normal, skew your results, or, more importantly, put your staff in harm’s way if something were to detach during operation.
We also recommend cleaning the inside of the sound enclosure, removing any loose dust or debris. When conducting a test sieve analysis, particles sometimes manage to escape the sieves and accumulate around the testing area and, in this particular case, the sound enclosure.
Failure to remove heavy accumulations of dust from the sound enclosure can result in the dust making its way into the motor of the RO-TAP, damaging it and causing costly downtime.
Improve Your Test Sieve Analysis Process
The W.S. Tyler RO-TAP RX-29 and RX-30 Sieve Shakers are both particle size analysis instruments that can be traced back to dozens of industry standards as they have been widely used for several decades. While the RO-TAP produces reliable results when used as a standalone device, pairing it with a lab kit will further enhance your test sieve analysis process.
The term lab kit refers to a test sieve analysis bundle that includes the RO-TAP unit itself, a test stand, and a sound enclosure that will greatly reduce the noise level of the device when in use. It should be noted that when you buy these three items as a lab kit bundle, a 10% discount is applied to each item.
When it comes time to install a lab kit, the process is not very involved. You simply pick a location that can properly house the lab kit, take the items out of their box, and bolt everything together. To make things easier, you should make any desired adjustment to the RO-TAP, such as adjusting its hammer height, prior to placing it in the sound enclosure.
Once everything is up and running, we do recommend that you periodically clean the sound enclosure and check to ensure the nuts and bolts are still tight and secure.
Here at W.S. Tyler, we use our 140 years of experience to ensure you implement an efficient test sieve analysis process that produces results that are optimal, accurate, and repeatable.
To learn how you can further improve your test sieve analysis process, take a moment to review our Test Sieves, Sieve Shakers & Particle Analysis Equipment Product Guide.
Want all the latest industry trends and innovations sent directly to your inbox? Subscribe to our monthly newsletters today.